How To Use Bunn Coffee Maker
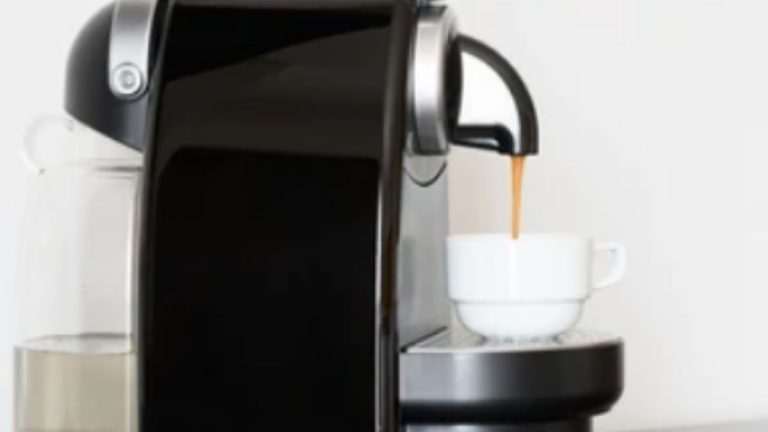
Bunn coffee makers are automatic drip devices that brew coffee using the pour-over method. They come in a variety of models, with the brewing capacity being the main variation.
Bunn makes single-serve coffee brewers as well as 10-cup coffee makers that can prepare a complete carafe of coffee. That’s not all, though. These coffee machines are simple to operate and can prepare a cup of coffee in as little as a few minutes!
The majority of people, however, are curious about how Bunn coffee makers function. Pour-over drip coffee makers work differently than automatic drip coffee makers because they have a unique brewing process.
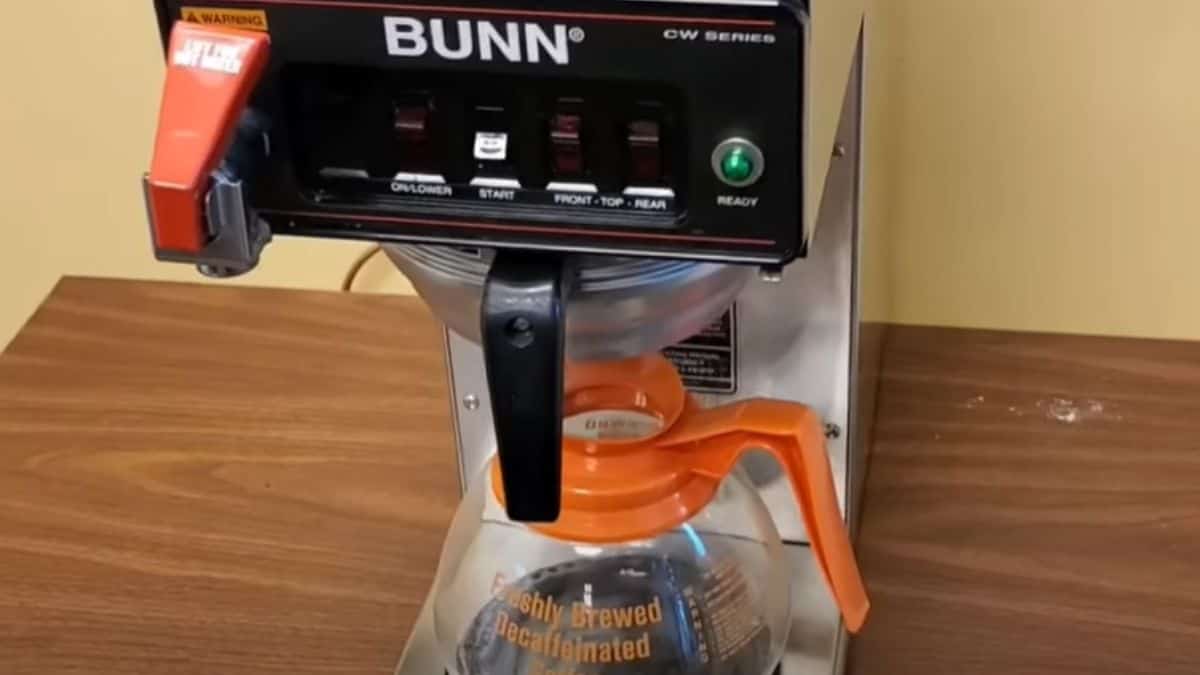
The design of a Bunn coffee maker is linked to its brewing process. The back of these coffee makers has a large tank, while the front has a brewer funnel. Most Bunn machines have a carafe warmer on the front that keeps your coffee warm after brewing.
Bunn coffee makers have a straightforward process. When you fill the brewer with filtered water and close the lid, the water is sent to the bottom of the tank via a unique pipe. Because the water in the water tank is already heated, the cold water will push it up.
During the brewing process, Bunn’s showerhead sprays hot water on the coffee, similar to the manual pour-over method.
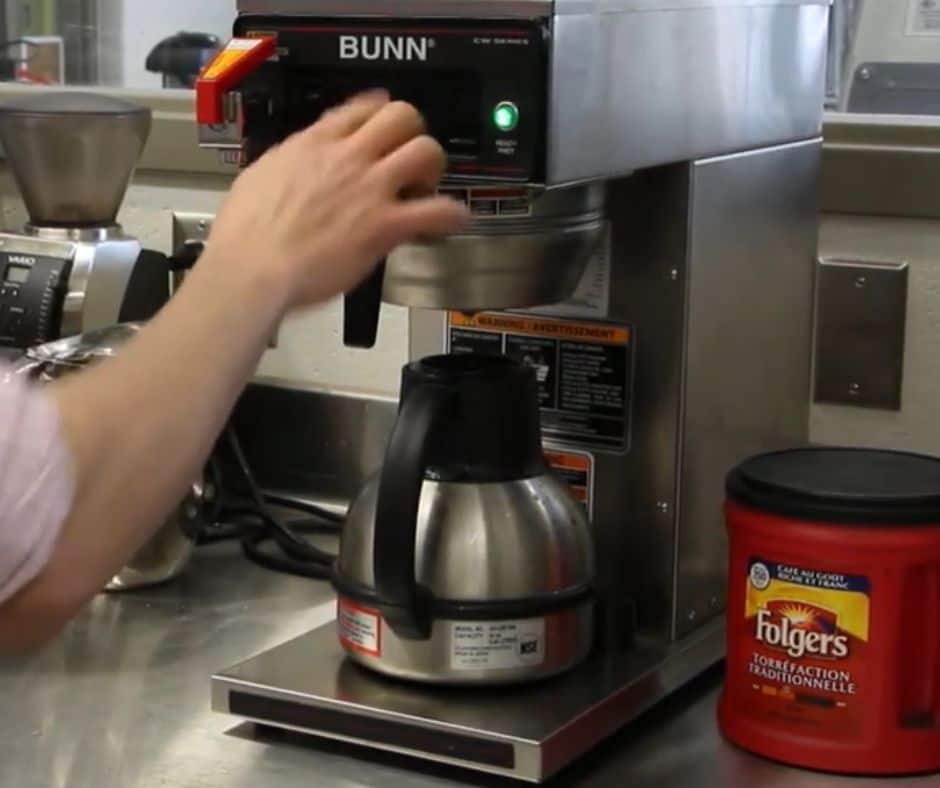
You’ve come to the right site if you’ve been asking, “How do I start a Bunn coffee maker for the first time?” This coffee machine is extremely easy to operate and can be used in any kitchen or office space that has access to electricity.
- Setting up for the First Time:
If you’ve just unboxed a new Bunn coffee maker, it is necessary to set it up before brewing your first cup of coffee. It isn’t difficult, but you must be aware of your surroundings. Remember not to connect the brewer unit until you’ve finished setting it up.
Instruction
- Make sure the machine is unplugged and turned off during this procedure.
The water heating switch is usually found on the coffee maker’s right bottom side. Make sure the switch is turned off once more, as it could cause harm to your Bunn gadget.
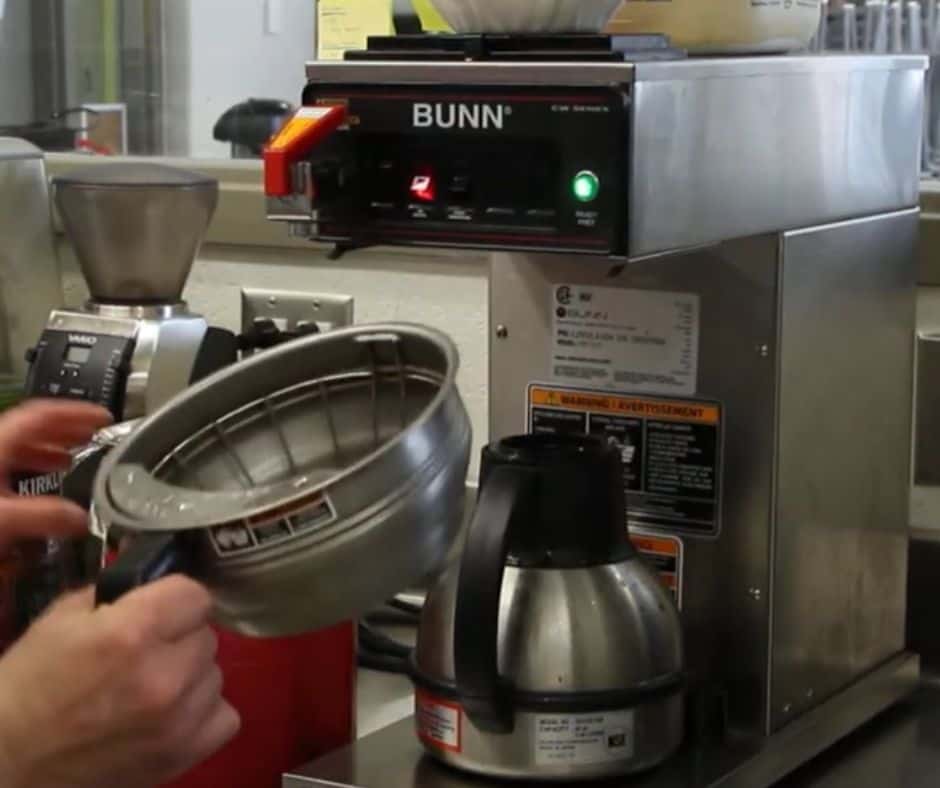
- Ensure the brew funnel is in position, before using the coffee maker
- Fill the coffee maker with like 10 cups of fresh water, depending on the model of your brewer, after it has been set up and the funnel has been placed correctly. After that, shut the Bunn’s lid.
- Place the carafe on top of the warmer dispenser spout. You won’t have a mess on your hands if the machine starts brewing this way.
- Water will flow into the tank in three minutes. Your Bunn coffee maker is ready to brew when the reservoir is full.
After your coffee maker is set up and ready, you may start making a hot cup of coffee.
Instruction
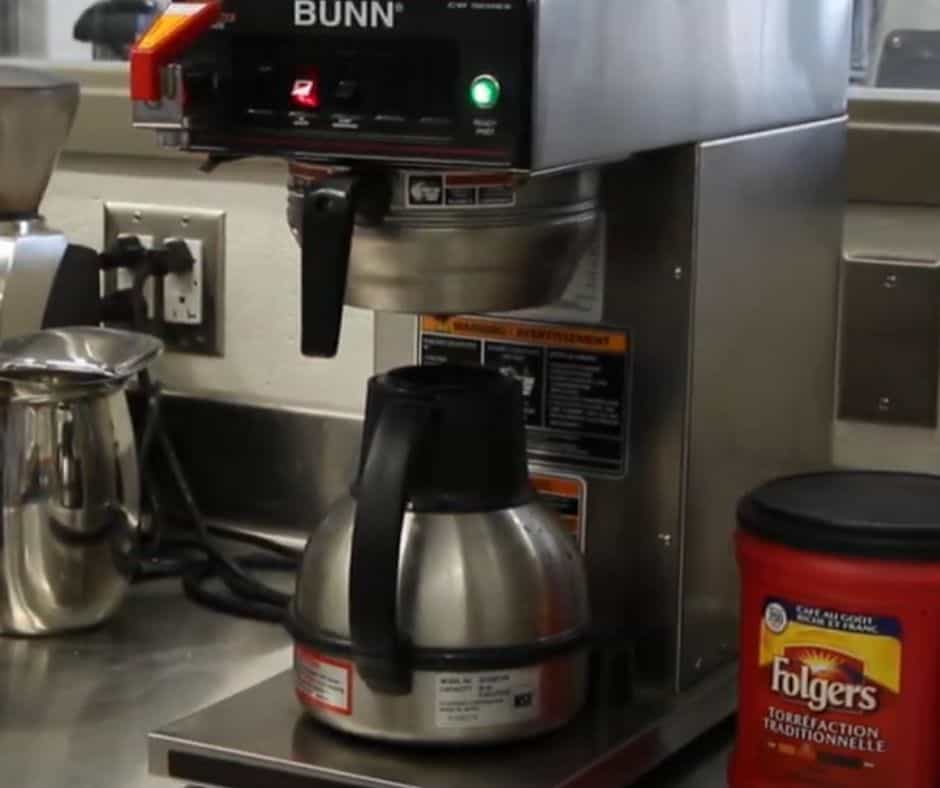
- Plug the maker into a power outlet when the reservoir is full and you’re ready to brew coffee.
- Turn on the heat. It will take about 15 minutes for the water to reach the desired temperature.
- Place the ground coffee and filter paper in the coffee machine after that.
- Pour cold water into a carafe and pour it into the brewer. Then switch the coffee maker to brew mode.
- To catch the coffee as it drips, place the empty carafe under the brew funnel or dispenser. If your brewer has a warmer option, you can use it while the coffee is being dispensed.
- You’ll have a full carafe of rich and fragrant coffee in minutes once your coffee starts brewing.
- Pour your coffee into a cup, sweeten it with sugar if desired, and enjoy!
How much coffee to use in Bunn coffee maker
Table of Contents
Coffee is the most popular beverage on the planet, thus it’ll be around for a long time. It’s critical to know how much coffee you’ll need in order to properly brew it and avoid wasting any.
Ground coffee can be measured in a variety of ways for a Bunn coffee machine. The greatest approach to do so, however, has been discovered to be by weight. As a result, a scale should be used to weigh the coffee for accurate measurement.
- 1 cup of water
In a Bunn coffee machine, the ideal coffee to water ratio is 10 ounces of water for every 2 teaspoons of ground coffee.
- For a full pot(12 cups of water)
Use roughly 9 level tablespoons of coffee for a full pot in a Bunn 12-cup coffee maker or other traditional auto-drip coffee makers. Automatic drip machines, like other coffee machines, use slightly more or less coffee depending on the desired strength of the coffee. Despite the fact that automatic coffee machines have 12-cup pots, a 9-ounce mug usually only holds about 7 cups of coffee.
Coffee ratios and production vary depending on the coffee machine. For example, a full pot of coffee in a 12-cup French press machine uses about 10 ounces of coffee. This recipe makes slightly more than 5 standard cups of coffee. Users should pay attention to bean coarseness in addition to suitable ratios. To prevent flakes from entering mugs, French press machines require coarse grounds, but automatic machines can handle finer grinds.
Why is my bunn coffee maker leaking
As much as we all love our coffee makers, one of the most typical problems that customers have over time is that their coffee maker begins to leak water.
One or more of the following causes can result in leaking: Inadequate upkeep or care. Wear and tear is to be expected. Deterioration of seals or gaskets in your brewer due to normal wear and use.
The Most Common Reasons include:
- Inappropriate Use
If you do not properly use your Bunn Coffee Maker, it will give you trouble in the future. Because it impacts the inside circuitry, this is the most difficult challenge to solve. The majority of folks who have this issue end up having to replace the equipment. Fortunately, because this is the least common cause, we won’t go into it any further.
- Damaged Seals & Gaskets
The silicone seal between the water reservoir and the water tank is the most likely reason for your Bunn Coffee Maker leaking water. You’ll notice the seal starting to melt and weaken over time if you use it frequently.
This is known as Planned Obsolescence, and it happens all the time. To correct this issue, you’ll need to purchase and replace the silicone seal. I’m not sure how to go about it. Don’t worry, the directions are provided below in the article.
- Mineral Deposit Formation
This is the second most prevalent reason for water leaking from your coffee maker. If the silicon seal appears to be in good working order, you should look inside to determine if there is any mineral accumulation.
This occurs when the machine is not cleaned and maintained on a regular basis. This is especially true if your home has hard water. The minerals in the water build-up over time, causing problems for the coffee machine. You’ll notice that water begins to escape from the machine’s bottom and sides.
It is very important to clean your coffee machine on a regular basis. To keep the equipment well-maintained and running effectively, you need to perform a deep cleaning process every couple of months. Later in this post, you’ll find step-by-step instructions on how to achieve this.
How to fix the leakage
Well, there are two ways to fix leakages. After you’ve finished inspecting your Bunn Coffee Maker, you should be able to figure out why it’s leaking. As previously stated, the two most common causes are a broken seal or a buildup of mineral deposits inside the machine. Here are the simple instructions for resolving both problems.
- Change the damaged seal
If you discover that a damaged seal is the source of your Bunn Coffee Maker’s leak, you’ll need to replace it. Don’t worry, you’ll be able to acquire one from Amazon without difficulty. You must replace the old, broken one with the new one once you receive it. You’ll find everything you need to know right here.
You Will Require
- Screwdriver
- Replacement Silicone seal
- Silicone Sealant
Directions of application
1. Check to see if the Bunn Coffee Maker is turned off.
2. Remove the screws on the top of the Bunn Coffee Maker with the screwdriver to open it up.
3. Carefully remove the plastic cover, then the plastic plunger inside. Once it’s been removed, make sure to clean it thoroughly.
4. Once the plunger is removed, the damaged seal will be visible within.
5. Remove the broken seal with care and replace it with the new one you bought. If it doesn’t fit properly, it won’t keep water from leaking out.
6. Once you’ve got the seal in place, seal it using Aqueon Silicone Sealant to make it waterproof and robust. This will ensure that the seal lasts for a long time.
7. Allow enough time for the sealant to dry completely.
8. Pour some water inside to examine if any water spills from the machine’s bottom or sides. If you don’t observe any leakage, you know you’ve mended it correctly and are ready to leave.
9. Replace the plunger and cover it with new ones.
10. Take a sip of your next cup of coffee and relax!
- Evacuate Mineral Deposition
When you discover that your coffee machine is leaking as a result of mineral buildup inside of it, you will need to clean it thoroughly. To avoid the buildup, do this every few months. To do so, follow these procedures.
You Will Require
- Toothpick
- Vinegar Blanche
- Soap for Dishes
Directions
1. Make sure your water tank is full of water.
2. Pour 4 cups white vinegar into the top of your machine, making sure the coffee pot is in place before doing so.
3. Begin the brewing process and wait for the coffee carafe, or pot, to fill up.
4. The water will be transferred from the tank to the pot, and the white vinegar will be poured into the tank.
5. Drain the coffee pot of water, turn the machine off, and unhook it from the wall.
6. Allow two hours for the white vinegar to rest in the water tank.
7. Remove the brew funnel and spray head after two hours (located directly above the coffee pot).
8. Examine the spray head for any mineral deposits. If this is the case, remove them using the toothpick.
9. Rinse the spray head with warm water and dish soap.
10. Pour water into the top of your coffee maker.
11. Reassemble your brew funnel and coffee pot and begin the brewing process. The vinegar will be flushed out of the system as a result of this.
12. Carry on with the water cycle for a few more minutes.
How to make coffee in bunn coffee maker
The following items will be needed in addition to your Bunn coffee maker:
- Cup or mug for coffee
- coffee beans that have been freshly ground (preferably espresso coffee beans, or even light-roast coffee)
- Depending on your coffee maker, up to 10 cups of fresh water
- Sweetener of preference (optional)
There are numerous suggestions that can assist you in perfecting your morning cup of Joe. To get the best flavor profile in espresso-based drinks like lattes and cappuccinos;
- Start with freshly ground coffee beans or a light roast.
- Add 10-12 cups of water, depending on how strong or weak they want their beverage to be; this will determine whether they should serve it at room temperature or hot, so it is not too cold during the winter months.
- If wanted, add some sugar (optional)
How to empty water from bunn coffee maker
The most common reason for draining water from a Bunn tank is to relocate it.To drain or empty water from a Bunn velocity brew, follow these steps:
- Disconnect the power supply: prior to removing the water from your Bunn coffee maker. The first and most important step is to switch off the light from the electric cable. You can easily accomplish this by simply unplugging the machine’s wire that connects to the power source. This will assist you and your machine in avoiding significant electrical harm.
- Allow the hot water to Cool: We now need to cool the hot water so that we can simply move the water out. We need to put cold water in the lid to cool down the hot water. To begin, open the top and pour cold water into the water tank using the craft.
- Remove the cold water:You must drain out cold water after emptying out all of the hot water from the reservoir. To accomplish this, begin by spinning the brew funnel and spray head in an anticlockwise direction. And then set them on the table. Now take your machine to the sink or somewhere else where cold water can be drained. Arrange your machine such that water will begin to flow from the spray head tube and the top cover.
Keep your brewer at this temperature until all of the cold water has drained from the spray head tube and top lid.
- Assemble all components:When you’ve drained all of the cold water from the brewer, stop. Now we must put together all of the pieces that we had set aside on the table. First, we’ll replace the spray head by rotating it clockwise, and then we’ll reinstall the brew funnel in its previous location.
- You’ll have an empty water Bunn at this point that you can move or carry about.
Conclusion
On the bleakest of days, a decent cup of coffee comforts the soul and bolsters the spirit. If you’re usually on the go, an excellent coffee maker, such as a Bunn pour-over machine, will create a quick cup of coffee in no time.
Bunn coffee machines have been on the market for many years. In many households and companies, they’re trusted to brew coffee. The multi-cup Bunn coffee maker is available in two types for those who need a lot of coffee at once. It has been fine-tuned over time to become an energy-saving gadget that turns off on its own.
Before you begin using it, you must thoroughly read the user manual. You can reference its repair guide if you run into any issues.
The most common maintenance service required is cleaning after each use and weekly cleaning of all components. For those unfamiliar with Bunn coffee makers, learning how to use one is a popular question, but after a few uses, you’ll get the hang of it quickly.To keep your coffee machine in good operating order, give it a thorough cleaning every few months.
If you have a Bunn coffee maker in your kitchen, I hope this article has motivated you to pull it out, set it up, and brew yourself a cup of delicious coffee. Sit back and relax with a tasty dessert and a cup of coffee; you’ve earned it!